
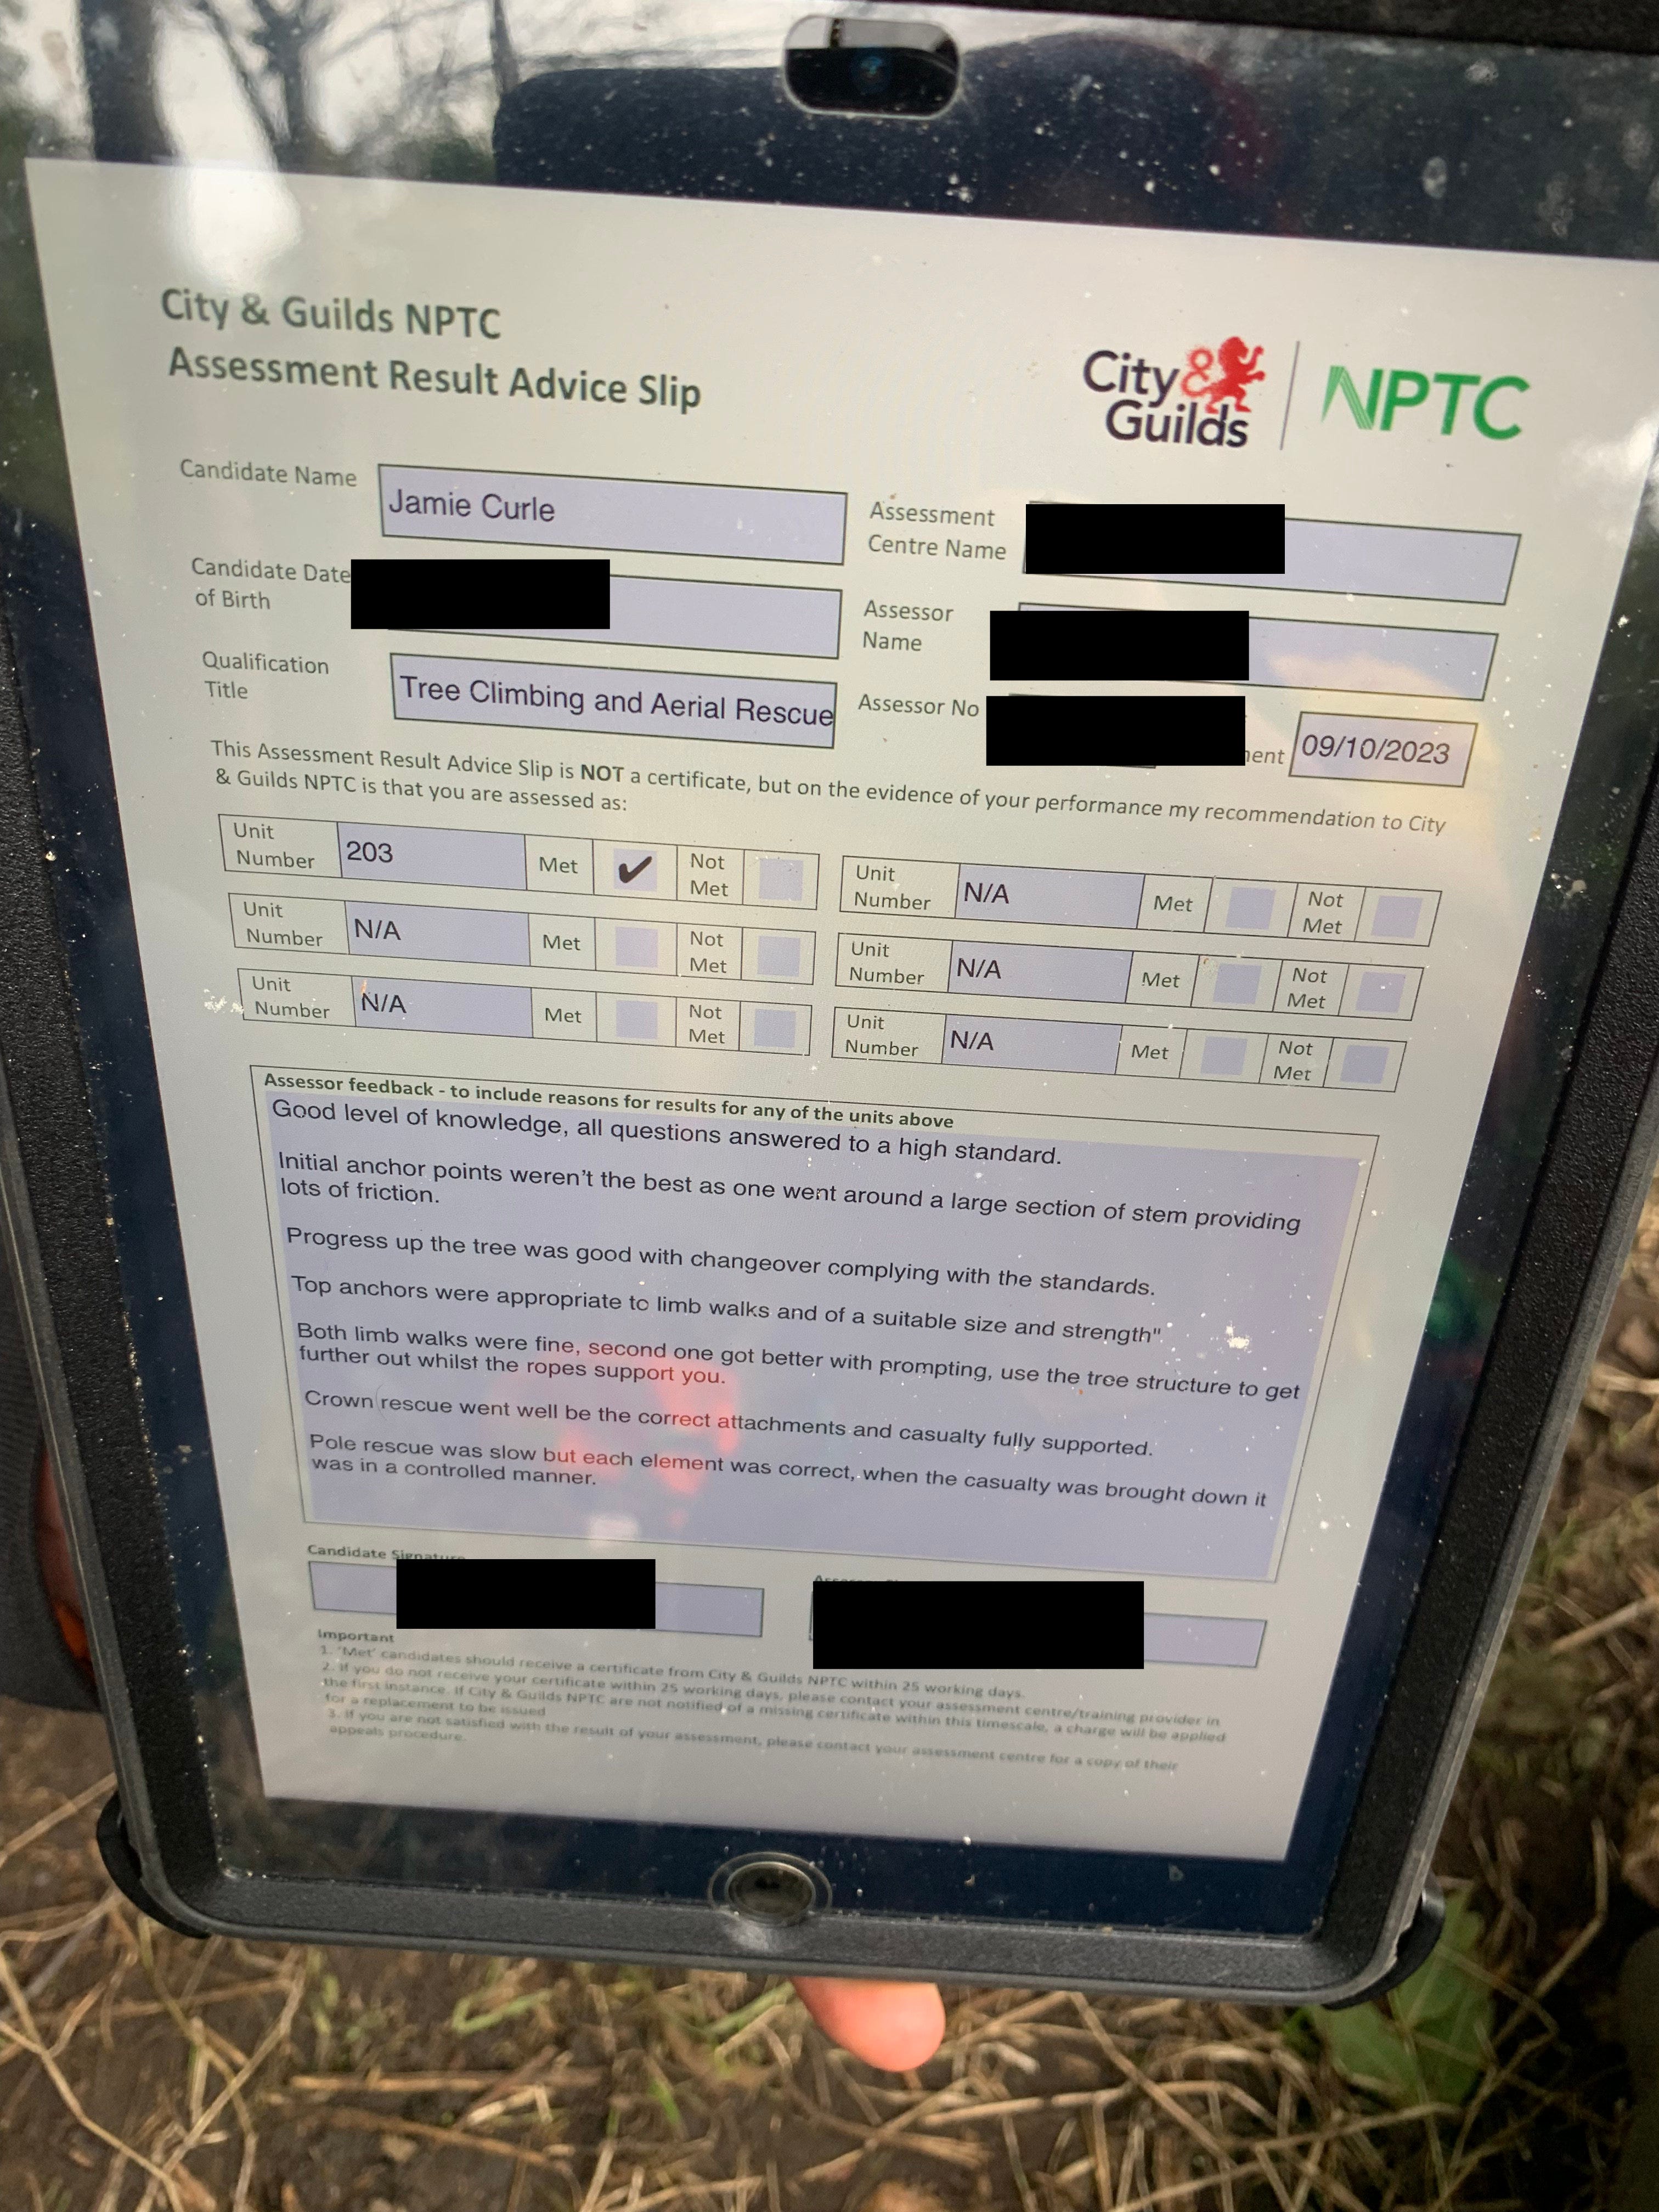
I passed my Tree Climbing & Aerial Rescue (CS38) assessment.
I passed my climbing and aerial assessment ticket, I can now be insured to professionally climb trees. But...

It wasn’t an easy assessment by any means. It was physically and mentally demanding and at one point I did actually realise just how much I don’t like heights and contemplated quitting. Obviously I didn’t do that. I worked through it and despite gaffing out and smashing my left arm up a bit on the pole rescue, I ended up a better climber as a result of getting through this assessment.
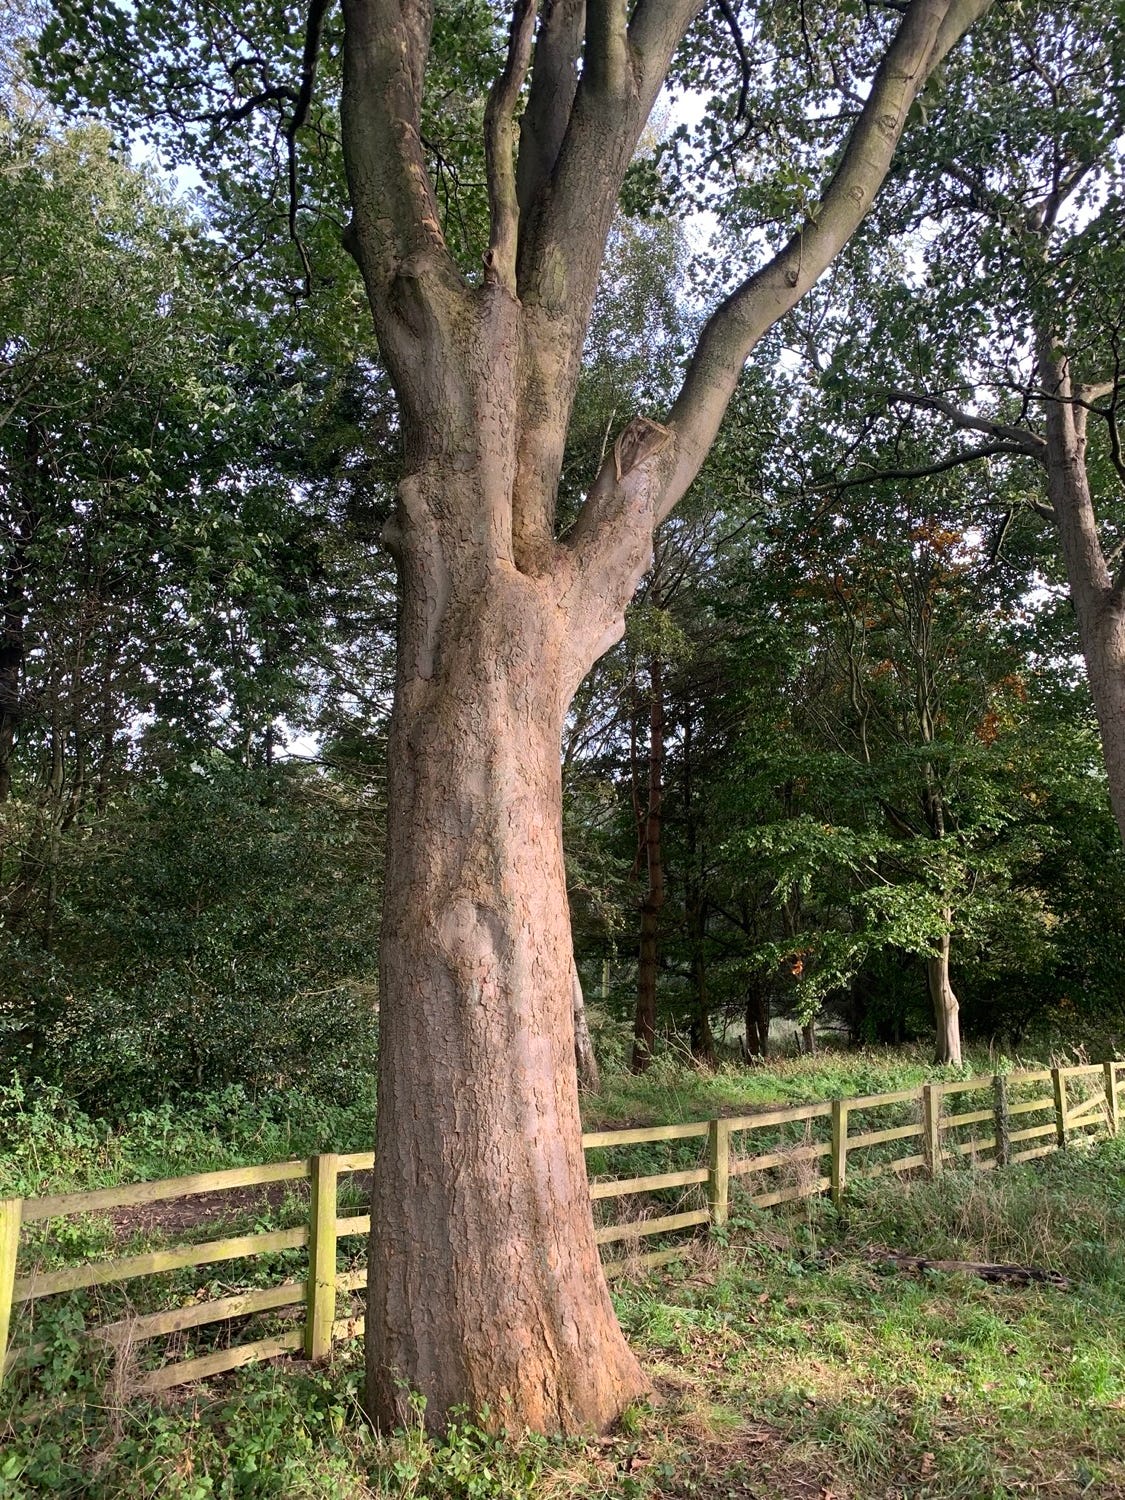
The tree I chose to climb was the above beech tree. It has been climbed a lot and pruned a lot. It is in decline and whilst it is safe to climb, it is a bit of a bugger to climb. Thanks to the pruning, many of the more helpful climbing limbs have been removed. As it is an old tree, many limbs that would be useful are decayed and cannot support the weight of a human on ropes. In short, of the six trees we could have chosen, I chose the hardest one for me. I had climbed this tree before so it was not new to me, but that was a while ago and I distinctly remember how hard limb walking in the tree was due to the fact that there were few limbs less than 40º in angle.
The assessment
The assessor, who I shall give the fake name of Joel Clemence1, split the assessment up into these distinct parts.
The bit where we went through the criteria (I wrote about these last week) and talked over the gear I’d chosen and the legal and safety requirements that applied to it.
The bit where I chose my anchor points, talked about my plan for getting up the tree and where I tied a three knot system.
The bit where he watched me climb the tree.
The bit where I did the limb walks.
The bit where I did an unconscious casualty rescue and a pole rescue.
The Criteria.
I’d been assessed by Joel Clemance before. He did my “Manually Fed Woodchipper” assessment and my “Individual Windfallen Tree” assessment. He has a knack of turning the arduous and endless list of criteria into a conversation. We hit all the points and I didn’t forget as much as I thought I would.
My climbing gear is new and it all meets the requirements of UK safety standards. Certification marks are present, serial numbers are visible, it is good condition it was inspected prior to use and the big one of requiring a LOLER certificate (Lifing operations and Lifting Equipment Regulations) didn’t apply as I had three days left of the six month window of first use. I was lucky on this point as had I been outside the six month window, even by one day, Joel pointed out that the assessment should not continue. Lucky me.
The main bits of gear you need to climb are two ropes, two friction hitches, at least two karabiners, a strop and a harness. You’re probably familiar with all of those things except the strop. Sometimes called a flipline or a lanyard, the purpose of it is a positioning tool. It is basically a mini rope that has both sides attached to you and around the tree. It is a critical bit of kit.
Anchor points and plan.
I’d already climbed this tree before and I remembered which route I’d taken up it. However this time I chose a different route. I did this because I remember how rubbish my top anchor points where for limb walking. I’ll admit that this was somewhat of a risky strategy as I could have ended up in a worse situation than before, but it all worked out just fine.
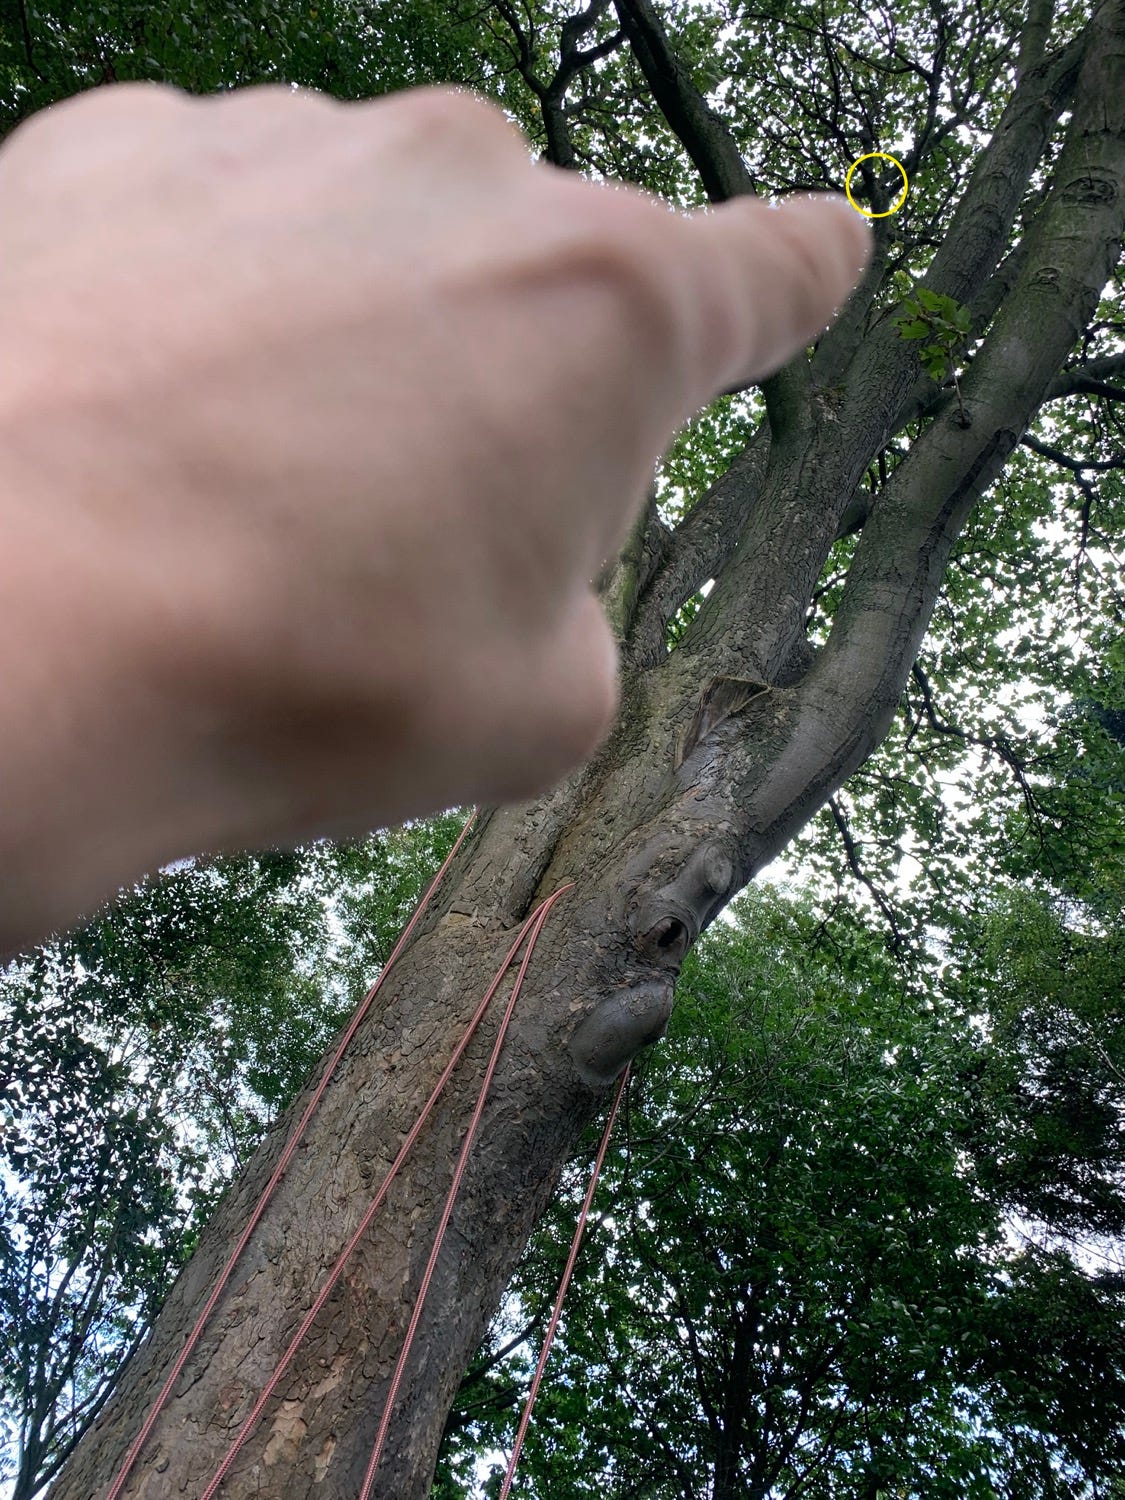
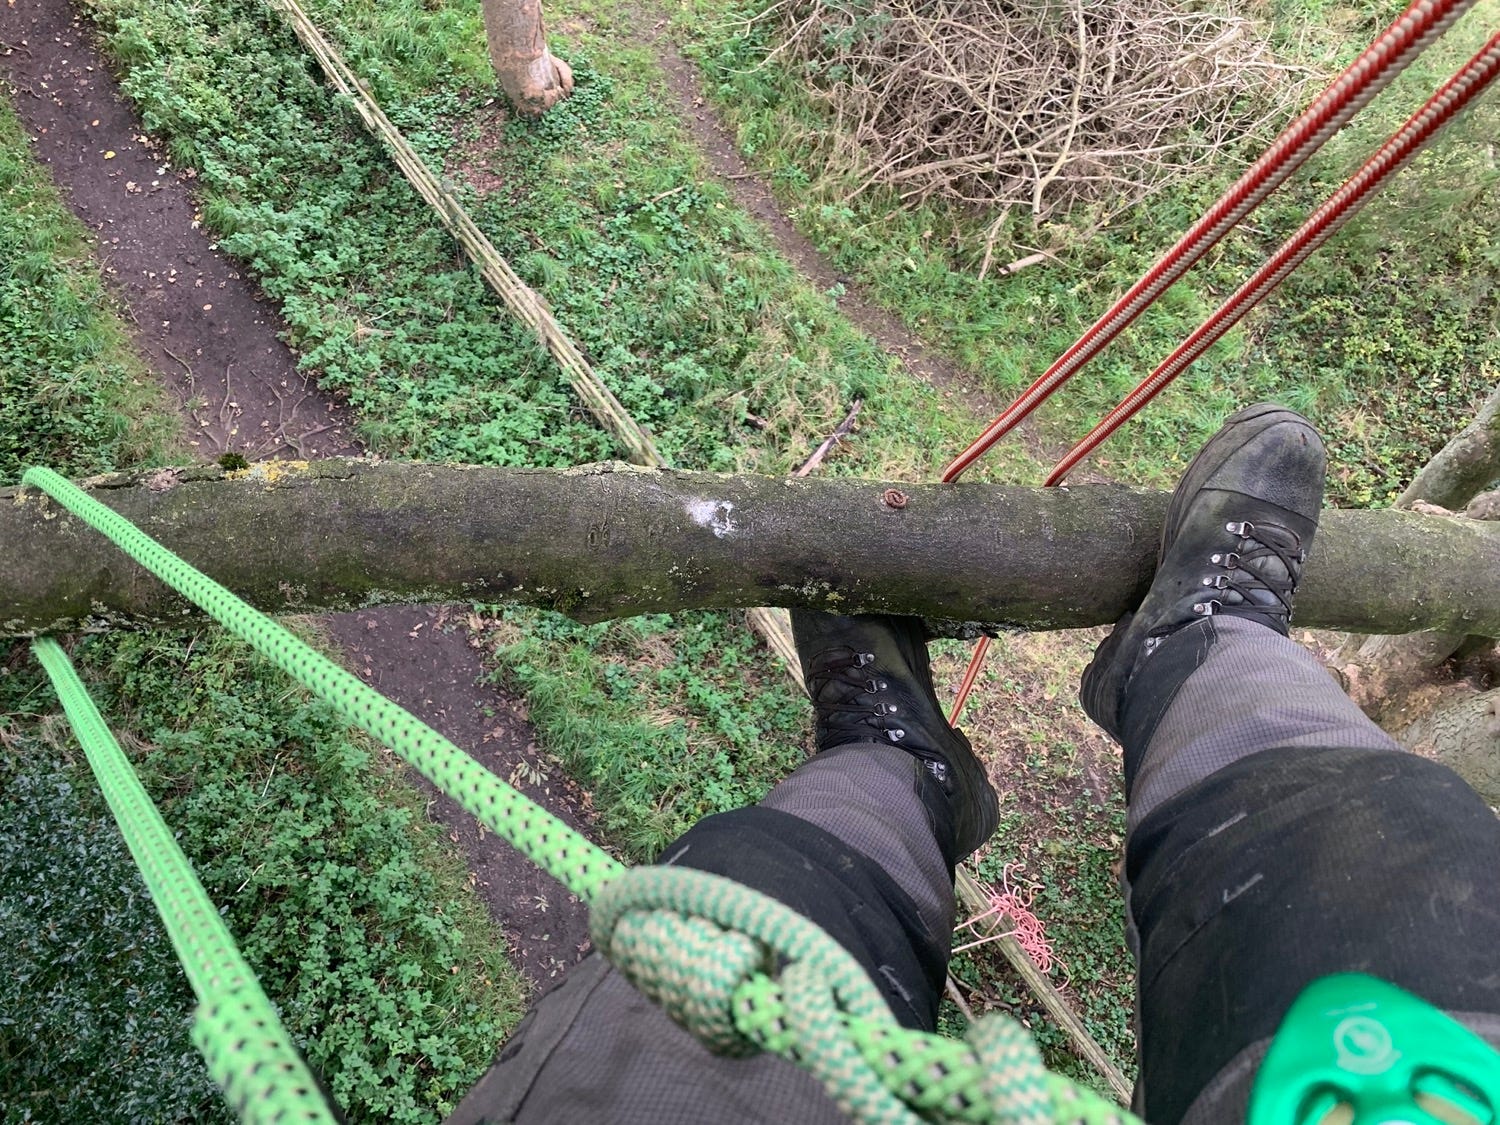
In the below photo you can see where I was aiming for. It was a limb about fifteen metres up, heavily knotted with all of the limbs showing signs of strong leaf growth. This is an important sign as it tells me every limb is alive and the chances of deadwood are greatly minimised.
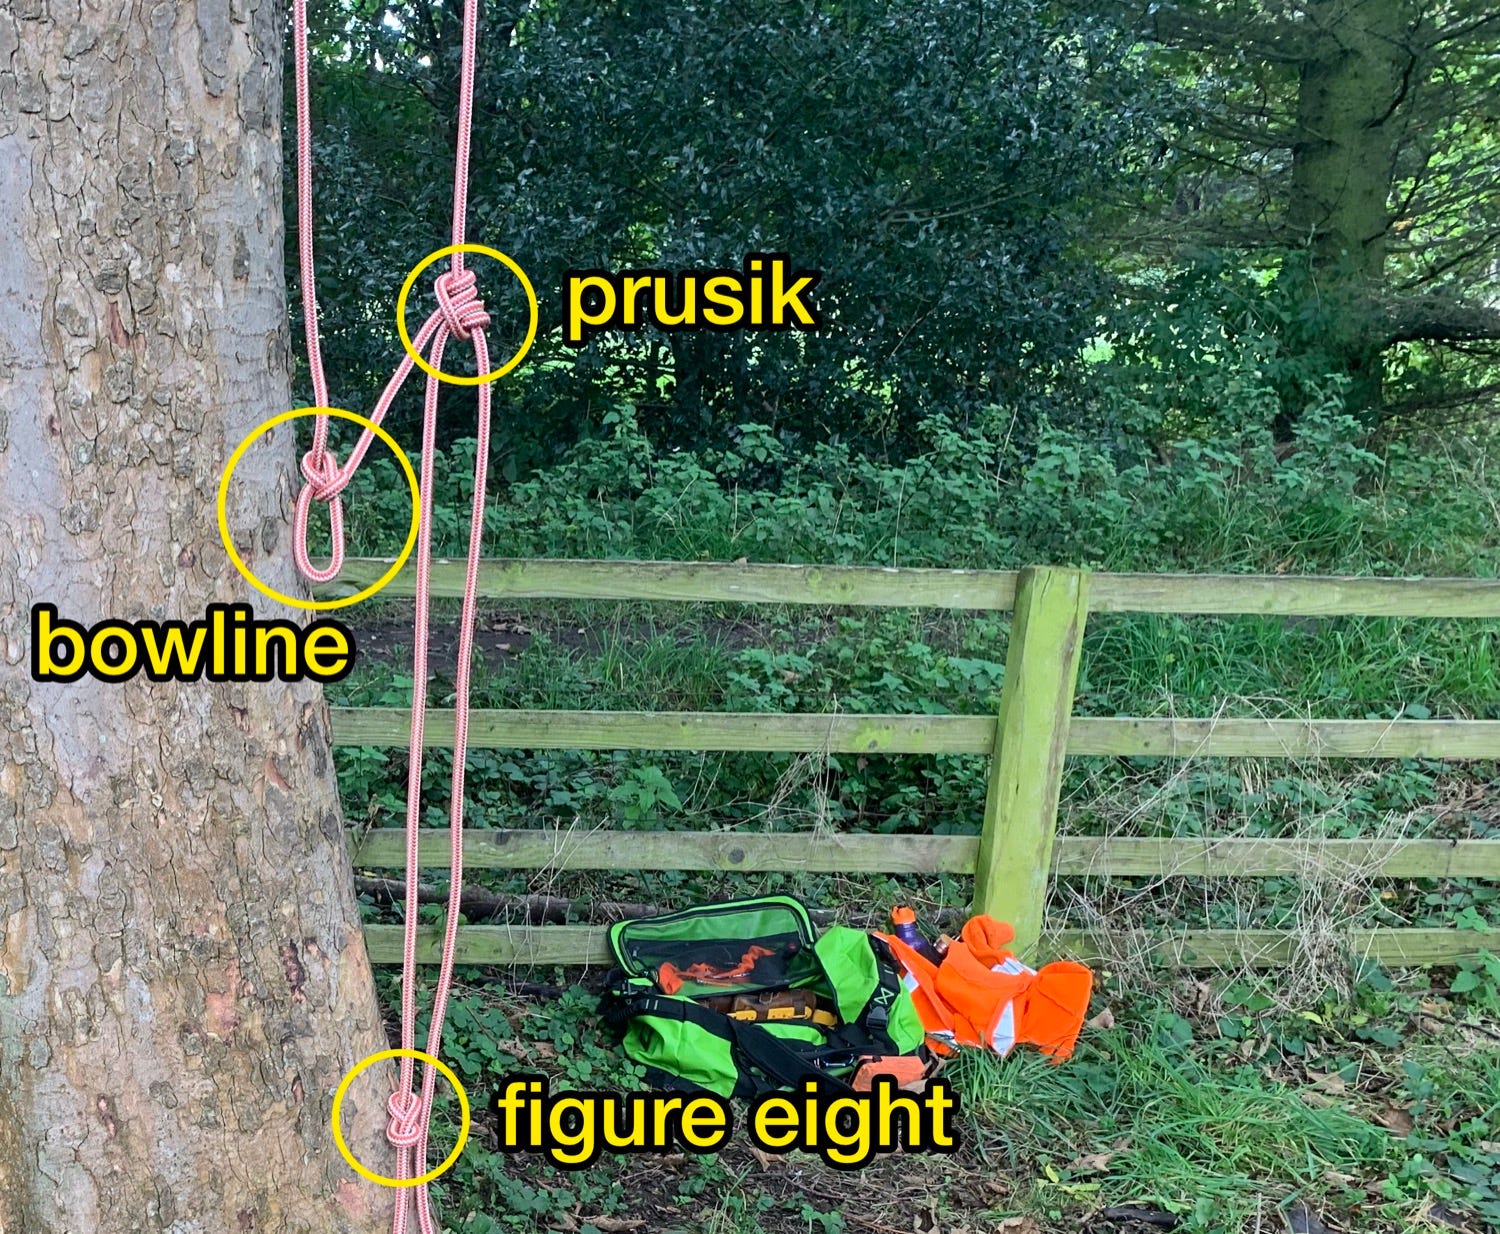
Once we’d discussed the climbing plan, it was over to the three knot system which is an emergency situation thing. The general idea is that using only a single piece of rope you are able to create a system that could, if it had to, be used to ascend or descend from a tree. It comprises of a bowline (you attach to this), a friction hitch to capture progress (I used a prusik, but you could also use a blakes hitch) and a stopper knot to ensure you don’t pull your rope through your friction hitch and fall and die. In essence it is the same as the system I used to climb on, only instead of a bowline I use a spliced eye on the rope and instead of a manually tied prusik, I use a prusik loop. The figure eight stopped knot is always used.
Climbing the tree
This is the big part of the assessment.
In the UK, the Health and Safety Executive (HSE) decreed that we must climb on two ropes so that at all times there are two attachment points between you and tree. In industry however, most people use one rope and it’s one of those things people tend to take positions on. One day I will write about it but today is not that day. Two rope climbing brings with it some overhead around change overs. They take longer and and thus everything takes longer (one of the reasons people go back to one rope). In the assessment you are watched to make sure that every changeover is done in line with the Aboricultural Asssociation Technical Guidance 1 (TG1). I see why such things exist, but they don’t add much joy to the world, just more bureaucracy and distance between “how it is done” and “how it should be done”.
I was a good little citizen and I demonstrated that I knew how to climb in compliance with TG1. It is all I know how to do if I am being honest. If I am being more honest, I am not quite sure I am ready to climb on one rope and strop. Joel was happy with my technique. Except for one thing…
When I bought my climbing kit there was one thing I didn’t take into account and that was that I’d bought two ropes of the exact same specification. This makes it hard to see which is rope A and which is rope B. I plan to fix this error by buying some new rope (and probably either a hitch climber or a zig-zag) as a second rope. Again, this choice will be something I write about. Again – future topic. However, because both ropes are the same colour it was not always obvious to Joel where each rope was placed. There was one point at which from Joel’s position on the ground, it looked like my rope was attached to a very dangerous situation. He shouted up to me “WOAH, WOAH - what you doing!?”. For a few seconds I thought I had done something stupid, but once I’d shown him what it was, it was clear the only mistake I’d made was having two ropes of exact the same colour. I’m getting a new, different, second rope.
Anyway, after an hour I’d made it to the top of the tree. Obviously, this is not fast enough for commercial climbing, but in my defence this tree required about twenty change overs and setting the ropes was a pain. I’ve don’t own a throwline and so I throw my ropes up into the tree. This is the slowest method for line setting as rope is heavy and you end up with a very low starting point. This means more tree to climb and more time is required.
About halfway up the tree I remembered that I was scared of heights and the fear nearly took over and froze me. I distinctly remember thinking “now would be the time to go to the ground and reverse out of this life decision, as this will be your job. If you don’t like it now, then you’re always going to be afraid each day at work”. It almost got to me, but I told that voice to shut up and I continued with the climb. This may have been a factor in my total time taken to get up the tree.
Joel pointed out to me that a throwline and knowing how to use it could allow me to at best, get some top anchor points in a matter of minutes, or at worst get me much further up the the tree as a starting point. Climbing rope is heavy and it doesn’t want to be thrown very far. The longer the rope goes off the ground the heavier it gets as five metres of rope weighs five times more than one meter of rope. Throwline is very small and very lightweight. It’s a bit bigger than fishing line and thus you can use it and a throw bag to throw or catapult a line WAY up into a tree. You really can save a lot of time like this. I fully intend to invest in such a thing to speed myself up as part of getting myself ready to be a commercial climber.
Once up in the canopy he gave me the green light to move to the next part of the assessment - the limb walks.
Limb walks
Being able to climb a tree next to the stem is one thing, but you need to be able to move around the crown of the tree to do work. Often you’ll be reducing or pruning a tree and so you need to be able to navigate to any position in the canopy. It’s your job to do this and only in a super sketchy situation would you be able to say “nope, not doing it” and even then you’d need to figure out a better way to get the job done.
The assessment has two limb walks. Each needs to be done on different parts of the tree and each requires that you reset your anchor points. I will write about limb walks and the techniques behind them later, but the gist is this. As much as they are called “walks” you are not actually walking and balancing. You sit back into your ropes so that they are under tension. Then, using your strop you attach yourself a nearby limb or, as in my case, the limb you’re walking on to prevent yourself from swinging back into the tree.
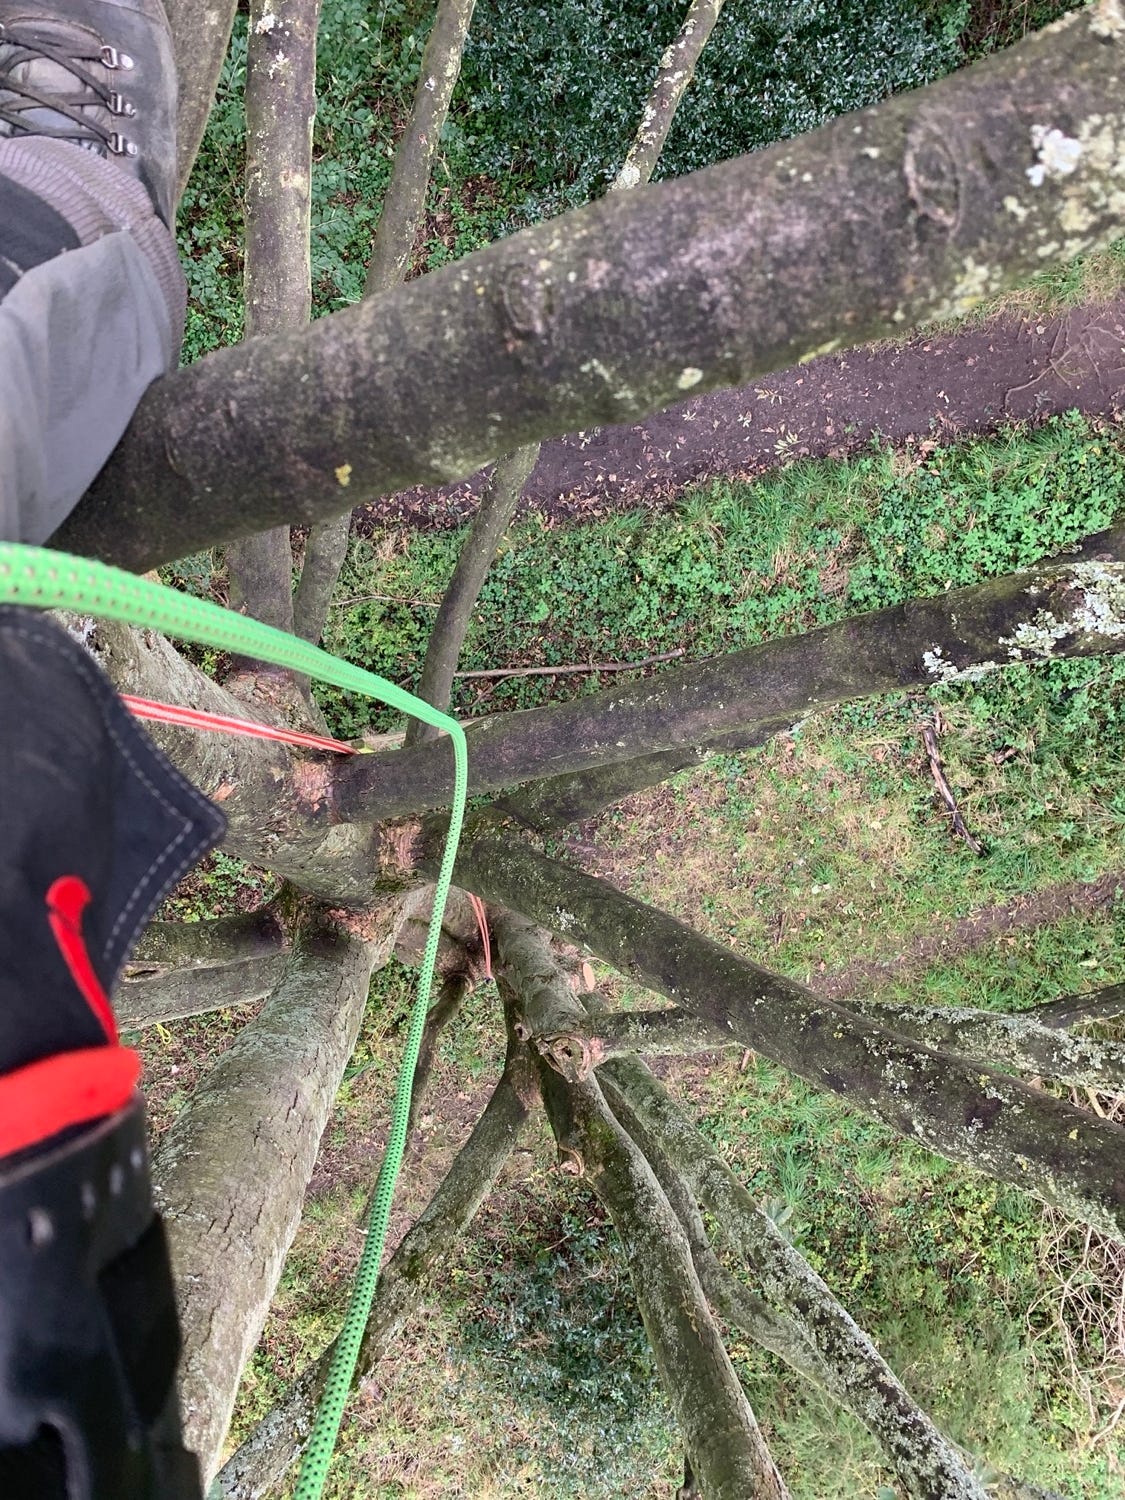
The above limb walk was one of the areas in which I developed as a climber in this assessment. I’ve mentioned a few times that the difference between assessment and industry is vast. What is done in assessment is never done in industry and vice versa kind of thing. I know that one of the techniques for moving around a tree is to use the features of the tree, such as branch collars and unions, as things to use in order to climb, move and navigate. I knew this was an industry thing. I was having a hard time on the above limb walk because I didn’t want to be seen to be doing an industry thing and so I could only get out five metres on the limb walk without using it. There was still about three metres of limb left “unwalked”. If I was doing a crown reduction I’d have to get out right to the very tips of the branch, however this was an assessment. Joel could see there was limb left to navigate and he prompted me to get after it. I said I could only do it using industry techniques that were likely not compatible with the holy grail that is TG1. A short conversation ensued in which he schooled me and the end result was that I learned that my assumption of that “all navigation around the canopy MUST be using ONLY the ropes” was incorrect. Using tree features, as pictured above is actually a key part of climbing in industry and in the assessment. Once he’d said that I was out on the end of that limb like a very big, very unhairy squirrel.
And with that I had both of my limb walks in the bag. Leaving just the rescues.
Aerial Rescue
I hope I never have to do this and if I do I hope it is just for a cut rope. However, you need to know how to get a casualty out of a tree and onto the ground. In the assessment I was asked to do an “unconscious casualty” rescue and a pole rescue.
I didn’t get any pictures of the aerial rescues and frankly talking about them is boring, so I will glance over them.
Unconscious casualty
The assessor looked where I was in the tree after the second limb walk and threw up a rope and rescue dummy into a place that required that I move around the canopy again to reach the dummy. The scenario here was that the dummy was a work colleague who’d passed out in the tree. I had to get up into the canopy, limb walk out to them and get them down onto the ground.
It’s harder than it sounds as you need get the casualty upright, connect them to your climbing system, disconnect one of their climbing systems and one of yours and then descend in a controlled manner back to the ground. Controlling this is hard because you have the weight of two people on one system and so descent either tends to very slow or very fast. I managed to get the casualty down in a controlled manner, correctly doing everything and also in a timely manner.
Pole rescue
I didn’t screw up the rescue, but I did screw up my arm in this bit. In the UK we tend not to climb on spikes a lot as most of the trees we work on are not removals and the bark on trees in the UK tends to be thin. The general consensus is that spiking is bad for the tree. I have not formed an opinion on this yet.
In this final part of the assessment I had to rescue a classmate who had spiked up a tree but for some reason is now stuck. Whilst I did everything correctly, I was very slow at it.
Spiking is different to climbing with ropes. On spikes you are basically walking up the tree with all of your weight being on the spikes that are attached to your ankles. It is both important that the spikes are properly seated in the tree and that you maintain the correct body angle. If you don’t do either of these things you can do what is called “gaffing out”. This is when the spikes slip out and you fall. Normally you don’t fall to the ground, as you have a strop around you and the tree, which catches you. As this was an assessment I also had a secondary bowline system in place.
I gaffed out. It didn’t look hard on me, but it was. I really dinged my left forearm as it got crushed between a rope and 77kg of falling me. I brushed it off but I was rattled and this slowed me down a bit. What also slowed me down as the fact I was using a running bowline system as a backup. This meant I had to detach and re-tie the system three times. The first time I screwed it up three times so in total I tied this system six times. More time was lost.
However, I got my classmate down, all by the book and no fouls other than using two ropes of the same colour, taking a while to get up the tree and taking longer than would be desirable to get someone on the ground in a pole rescue.
Finally, after a good few hours, I’d earned this.
I have a long way to go in becoming a decent climber and let’s not also forget that this qualification doesn’t allow me to be insured to use a chainsaw in a tree. That’s the next climbing qualification. Having said that, this qualification is a milestone because whilst climbing a tree is something that I am bound to tire of, and whilst climbing a tree should be the last choice you choose, climbing a tree is an iconic task of a tree surgeon.
This time last year I was a total beginner at it. Now I find myself in the novice category and with practice I’ll get that sweet spot of intermediate. I’ll leave the advanced stuff for later. One step at a time – one step at a time.
It’s now 10:02am and in one hour I need to load the car, get ready to go to the woodland, sharpen two chainsaws, cook and eat breakfast.
I best get at it – thanks for reading,
I appreciate your attention,
Cheers,
Jamie.
If you know this name, then you’ll know the true name of my assessor. But please don’t give it up to the internet in the comments. I don’t have his permission to do so. If you name him in the comments, I’ll edit it out. You know how I am for not breaking information security and data protection protocols.
Off topic ... but I just wanted to let you know that one of the books you recommended, "Applied Tree Biology" landed in my letterbox two days ago. Leafed through it last night before sleep ... just to get a feel for the content and look at the graphics ... It's just the sort of book I was thinking of when I asked for your advice :-) All about trees; what they are and what they're up to before they are killed, dried, sliced and sold to butchers like me.
I will not have the time to study and understand it's contents as thoroughly as you do during your education, but I will read it through, some of it will stick and I will be a better informed woodworker for it. That's not nothing! Pluss, I'll leave behind a more comprehensive shop-library -- my little contribution to a better future :-)
Thanks for the tip!
That was really high, looking down from one of the photos showed just how high…you know how I am with heights so I think you are very brave indeed…SO Jamie, congratulations on passing your tests, dare I say (many more)…